Showing posts with label Avery Elle. Show all posts

Tuesday, 28 April 2026

Penny Black Daffodil Days birthday card


Hello everyone, and welcome to another challenge at Addicted to Stamps and More.


The time we're asking you to make your mark with any colouring medium you like, so you can break out your favourite. 


I stamped the Daffodil Days stamp from Penny Black onto Bristol paper and coloured it with Zig Clean Colour pens before die-cutting the image. I die-cut the scalloped oval from Mama Elephant, inked it with blue ink, then placed my image on it. I finished off by stamping the sentiment from Avery Elle and adding a few blue gems.

I'd like to play along at


I decided to have a mini reorganisation of my craft space over the past week, and you guessed it - mini turned into maxi very quickly, and I got into a right old mess. Of course, once I started, the weather turned glorious, and my husband wanted to make the most of it, so my messy room has had to wait. I hope you are having good weather wherever you are.

Hugs,
Carol x


Wednesday, 11 June 2025

The Greetery and Avery Elle candle Christmas card and music Christmas card


Hello everyone, and I hope you are well and happy. How can half the year have gone by so quickly? We are at our mid-year challenge at ABC Christmas Challenges, and this time we have 

L for light
and/or 
M for Music

Helene is our host this time, and she has a lovely prize for the randomly drawn winner
 

This is what I came up with for my Light card


I cut the window (The Greetery) in white card and coloured the frame with grey ink to resemble an old church window. I inked the panes in blue and yellow before placing them back in the frame.

The candles come from an NBUS stamp and die set called Candlelight Christmas, and I coloured the images with Copic markers. I layered the branches over the candles and topped it all with the pretty bow before adding the sentiment from the same set. I then added the window to a scallop-edged stitched rectangle die-cut, which I had blended with the same blue ink.


My M for music card also used some products from the Greetery.


I began by using a Spellbinder Press Plate called Lest Us Adore Him, and passed it through the Betterpress after inking. I then cut the card with one of the Nordic Frames dies and layered it onto silver card.

The Music clef and notes come from the Greetery, Let Heaven and Nature Sing dies, and I finished off by adding a trio of die-cut circles.
You can see the shine a bit better in this photo.


As always, the design team have some great inspiration cards for you on the ABC blog, and we'd love to visit if you decide to join us this time. 

I'd like to play along at


Thanks for stopping by,
Hugs
Carol x

Wednesday, 26 July 2023

Hero Arts and Pinkfresh Studio You Make a Difference birthday card


Hello everyone and welcome to the new challenge at Addicted to Stamps and More.


This time we'd like you to make your mark by using any colouring medium you choose.

I came up with this one:-


 I began by colouring some white card with pale green Pan Pastel. I then stamped the floral frame stamp from the collaboration stamp set that Hero Arts and Pinkfresh Studio made called You Make a Difference. I stamped with pale green ink and then went over all the image with alcohol markers. 

I cut the image apart with my NBUS die called Halfsies Diamond from The Greetery, which left a diamond shape offcut which continued the image into the centre. I cut another 2 Halfsies in white card and then coloured the edge with a yellow alcohol marker to tone in with the image. Finally, I arranged all the pieces onto a square card and placed the stacked die-cut sentiment from Avery Elle in the middle.

Our design team have some great hand-coloured samples for you over on the ATSM blog and I hope you feel inspired to join us this time.

Thanks for stopping by.
Hugs
Carol x 

Wednesday, 27 October 2021

John Next Door baubles and Avery Elle Confetti Mat Christmas card


Hello friends and I hope you are all well.


It's time for another challenge over at ATSM and this time we are looking for your Christmas projects.


For this challenge, I decided to go with a card that has no stamping whatever and can easily be mass-produced if you are prepared to spend some time prepping all the die-cut pieces.


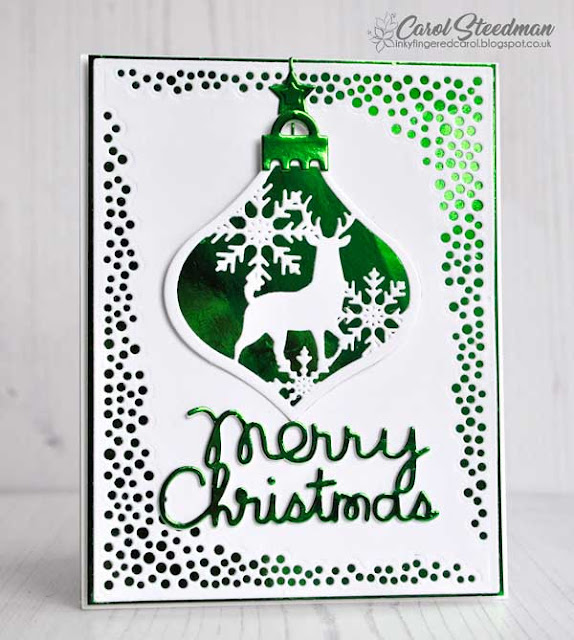
For the background, I used the Avery Elle Confetti Mat layered onto some green mirror card from a Tonic Pad. The bauble is a new die set from John Next Door called Penny's Baubles and, once again I matted it onto the green mirror card. The sentiment is from Paper Smooches and I stacked it 3 times to give a bit of dimension.

I'd like to play along at


Tuesday, 4 June 2019

My Favorite Things Happy Pawlidays non-traditional Christmas card


Hello there and welcome to another challenge at Happy Little Stampers Christmas Challenge.  This time our fun twist is to make a non-traditional card but you can do anything you like as long as its Christmas if the twist doesn't take your fancy.


I went with the twist and came up with this card that will wing its way to a dog loving friend come Christmas. 


I stamped and die cut the cute little dog from My Favorite Things Happy Pawlidays and coloured it with Copic markers, then stamped and white embossed the sentiment from the same set.

I used the Avery Elle Confetti Mat Elle-ments die to create the panel and backed it with some PTI blue card.


I layered everything up before adding some die cut hearts that I covered with WOS then added several layers of glaze pen to give some shine. I finished off by adding glitter to the hat and going over the dog's eyes and nose with a black glaze pen.

As always, my talented teammates have some great inspiration to share with you over on the HLS Blog and I know they would appreciate it if you stop by to visit.

I'd like to play along at

2 Crafty Critter Crazies Challenge #27 - anything goes with a critter

Crafty Animals Challenge #27 - anything goes

Winter Wonderland Challenge - anything but a square card

Thanks for dropping by.

Hugs
Caol x

Saturday, 30 June 2018

Chloe Leafy Wreath and Avery Elle birthday card


Hello and welcome back to the July challenge at Happy Little Stampers Watercolour Challenge We are an anything goes challenge but each month we have a fun twist for you to join in with if you wish, and this time our twist is 'birthday'. After Christmas cards, I make more birthday cards than any other, so if you are like me, this will be a good incentive to build up your stash.


I love mixing up my stash, especially when I can use new items, then add older titbits and breathe new life into them. That's what I did here


1) Die cut a pierced square and sponge the corners with some yellow ink. I stamped my new Chloe Leafy Wreath stamp using Zig watercolour pens directly on the stamp, spritzed with water and then stamped. I turned the square a little and then stamped again for a second generation impression.

2) Die cut several Chloe Mini Flowers, colour the petals with a Quickie Glue Pen and then ad some fine glitter. Colour the centre of each flower with an orange marker. When everything is dry, shape the flowers and stick them around the wreath.

3) Die cut a stitched circle and stamp the sentiment from Happy Little Stampers Thinking of You set in the centre. Stamp the Happy Birthday using the Clearly Besotted So to Speak stamp set in black ink, fussy cut it to lose the speech bubble part, and add it to the circle underneath the sentiment. Raise the circle on fun foam in the centre of the wreath.

4) Die cut a pierced square in yellow card and mat the wreath onto it.


 5) Take a Die'sire stepper card and lightly watercolour the sides with yellow watercolour diluted from a Zig pen.

6) Once it is dry, stamp the flower spray from the Altenew Beautiful Day stamp set and watercolour with Zig pens.


7) Finish off by adding a couple of birds and butterflies from the Avery Elle Storybook stamp and die set. Layer up the squares in the centre on the card raising the white panel on fun foam. Use a Quickie Glue pen to add dots of glue around the wreath and add some glitter.

There is a lot of inspiration over on the HLS BlogHLS Blog, and I hope to see you over in the gallery.

I'd like to play along at

Moving Along With The Times challenge - June Blooms

The Crafty Addicts Challenge #49 - say it with flowers

Paper Minutes Challenge #543 - summer meadow
Thanks for stopping by.

Hugs
Carol x

Tuesday, 27 February 2018

Baby wall art using Sara's Signature Little Angel Collection


 Hello and welcome back to our popular Anything Goes week over at  Addicted to Stamps and More challenge.


As you know, we had a new addition to our family late last year when our first Grandchild, Alice, was born.  I wanted to make something for her but I am an atrocious knitter so I raided my stash and made this wall plaque to welcome her.


1) Take a papier-mache plaque and remove the paper cord before coating it with white gesso.

2) Paint the plaque front with grey paint. I used a tester pot of emulsion paint that I had in from when we decorated my craft room. When it is dry, repeat on the back and then give everything a second coat.

3) Take the Memory Box stencil 'Stars Starry Nights' and place it on the plaque so you can spread glitter texture paste through it. This was a little time consuming because the stencil is smaller than the plaque, so you have to do it in stages, letting the paste dry each time before moving onto the next bit.


4) Die cut the Friendly Elephant ( from Crafter's Companion) using some paper from the CC Little Angel paper pad and ink through the die to enhance the features. Curl the elephant's ear and then cut it again from some white card and stick it to the back to give the image some structure.

5) Die cut the heart balloon from the Balloon Trio set from the same CC range using some stripey paper from the same pad. Cut the strings from some coordinating paper.

6) Cut three banners from grey card using one of the PTI Countdown details die and stamp and white emboss the words from PTI Wonderful Words: Baby Stamp Set.


7) Stamp the greeting on the back in Smoky Shadow ink using a mixture of Avery Elle Lovely Letters alphabet stamps and PTI Love Lives Here.

8) Finish off by adhering the elephant and balloons to the front and replacing the paper cord.

I'd like to play along at

Shopping our Stash #343 - Stashed Stencils

International Art and Soul Challenge #27 - Use stuff you already own

Alphabet Challenge - X for Xtra Special Occasion


Thanks for stopping by.

Hugs
Carol x


Friday, 31 March 2017

Happy Little Stampers and Avery Elle Encouragement card


Hello everyone,

I don't know where the year is going to but I can't believe we're up to April when it seems we only put the decorations away last week! It's time for another challenge over at Happy Little Stampers Watercolour Challenge, where this time our optional twist is Rainbows, and I'm sure we'll be lucky enough to see plenty of those in the coming month after all the April showers. 


our winner this time will receive a $15 discount at the HLS Stamp Store


I came up with this simple little encouragement card destined to wing its way to a friend of mine who has been going through a rough time lately.


1) Take a panel of Mixed Media card and paint rainbow stripes across it using Gansai Tambi Watercolour paint.

2) Stamp the sentiments from HLS Rainy Days and Avery Elle Brushed with black Versafine ink.

3) Stamp the cloud from the HLS Rainy Days stamp twice, and fussy cut them both, snipping off the sun as you go.


4) Mat the panel onto black card and then onto a red stitched rectangle before placing it on the base card.

5) To finish off, stick one cloud flat on the card and raise the second one up on foam tape.

We are fortunate to have the talented Julie as our guest designer this month, and you can see her lovely card, along with lots of inspiration from the team, over on the Happy Little Stampers Blog.

I hope you will join us this time.

I'd like to play along with


Thanks for stopping by

Hugs
Carol x 


Tuesday, 28 March 2017

Avery Elle You are Amazing card


Hello everyone and welcome to another challenge over at Addicted to Stamps and More. We have a gorgeous inspiration photo for you this time


and just look at the beautiful blue hues and pretty butterfly to get the creative juices flowing.

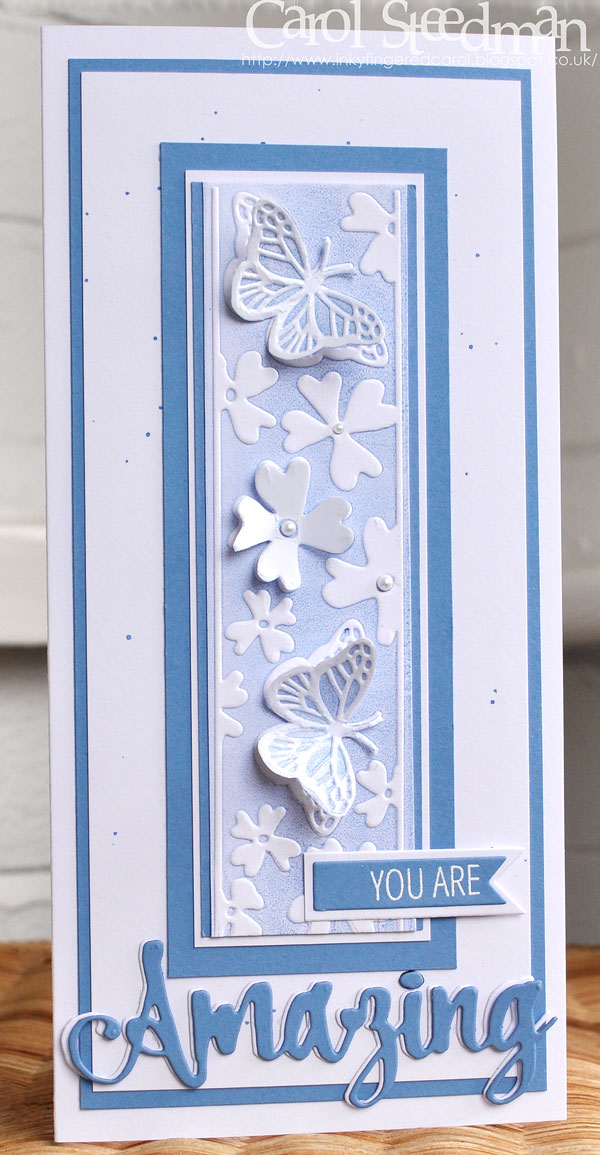
I have a small border embossing folder in my stash that came free with a magazine, so I decided to pull it out and have a play, using an inking technique I have seen used but never had the courage to try.


 1) Take a butterfly embossing folder and ink up the inside with a brayer using pale blue ink. I had to try it out a couple of times before getting the ink in the background where I wanted it.

2) Repeat this and fussy cut the butterflies and the largest flower.

3) Make mats and layer them up onto a DL sized card, spattering a little blue ink onto the white panel.

4) Die cut a small banner and white emboss the "you are", from Avery Elle Simply Said Amazing set. Place this on white card and fussy cut around it to create a mat.

5) Use the die from the accompanying set to cut "Amazing" in blue and white card and layer them up to create a shadow effect.

6) Layer everything up and shape the butterflies and flower before adding them to the card to give dimension. Finish off with a few tiny pearls on the flowers.


I was pleased with how this turned out, and will certainly try inking up embossing folders again. It made me so happy when the background came out coloured and the butterflies and flowers stayed white - it reminded me of the first time I saw heat embossing! Okay - I know I should get out more lol! I decided not to put a greeting inside yet, so I can use it for a birthday, passing an exam, or just as an encouragement note. 

You'll find lots of inspiration over on the ASTM blog and you have a week to play along with us. 
Thanks for stopping by.

Hugs
Carol x

Friday, 11 November 2016

Thanksgiving turkey card


Hello everyone and welcome to the last challenge of the year from Simply Create Too

Simply Create Too Challenge Blog


and the theme this time is Gobble gobble - we need to see a turkey!!!


I have to confess that I have never had call for a card with a turkey on it before, so as I had no appropriate supplies, I turned to my trusty Silhouette Cameo and found a cute turkey image there. This card was the result!


I began by cutting the Papertrey Ink You've Been Framed: Oval die from orange card and then again from some patterned paper, and attached it to a white base card.

Then I cut my turkey in white card and coloured it with Distress Inks. I took a stamp from PTI Happy Trails and gave Drumstick (well he had to have a name don't you think?) some fancy feathers because he wanted to look handsome in time for Thanksgiving. I coloured his beak, legs and comb (had to look that one up!)with a Copic marker, and then added some googly eyes, before mounting him onto the card.


To finish off, I used the Avery Elle Lovely Letters stamps to spell out Happy Thanksgiving. I'm ashamed to say I've had these stamps for at least three years but I'd forgotten I had them. They are so easy to join up as long as you stamp one letter at a time, and I'm going to put them with my more loved stamps so I don't overlook them again. 

I do hope you will pop over to the SCT blog for some more inspiration and join in with us this time. We'll be be back in January when we will be changing to a monthly challenge.

I'd like to go and play at


Monday, 31 October 2016

Papertrey Ink and Crafter's Companion new baby card


Hello everyone, and welcome to the November Case the Designer Challenge over at Happy Little Stampers. We are having a little switch around for the November and December challenges, so you can choose from cards designed throughout the year,  


I chose to CASE this sweet card by the lovely Kim of Cupcakes, Cards and Kim blog


I have used up all my baby cards over the past few months so I came up with this one to help replenish my stash. I used the same Papertrey Ink Comic Strip Cover Plate as Kim used, but changed up the contents. I double cut the cover plate so I could inlay the inked paper to give some dimension.   


The paper, ducks, rattle and dummy are from the Crafter's Companion Little Angel die collection and I die cut and inked them before mounting them onto the panel with foam tape. The die cut 'baby' used the Papertrey Ink Wonderful Words Baby die, and I triple cut it to make it more substantial.


To finish it off, I stamped and embossed the 'welcome little' sentiment from the Avery Elle Storybook stamp set before matting and layering the panel onto the base card, and scattering some die cut stars around.

You can see all the cards you can CASE for the challenge over on the Happy Little Stampers blog.

I'd like to play along with


Thanks for stopping by

Hugs
Carol x

Friday, 30 September 2016

Papertrey Ink and Avery Elle New Baby Card


Hello everyone and welcome to the October Happy Little Stampers Challenge and this time we have a lovely card from Birgit to CASE


I decided to case the stitched rectangle of patterned paper, the central frame for the image and to use a bird die cut die cut. I needed a baby card  too, so I came up with this card


The background paper is from the Echo Park Bundle of Joy Dots and Stripes pad, and the frames use the Papertrey Ink Mat Stack 1 set. I cut both frames in white and added a copic pen to the edge of the larger one to tone in with the dotty paper. On the smaller, white panel, I inked some couds and stamped the sentiment from the Avery Elle Storybook stamp set.


The stork and baby bundle came from the PTI Bundle of Love stamp set and I embossed them in black, fussy cut them, and then coloured with Copics. To finish off, I added some glaze pen to the baby bundle and scatted a few stars and enamel dots.

How would you CASE Birgit's lovely card? If you want some more inspiration, why not jump over to the HLS Blog to see what goodies the team has to share.

And if you need more incentive to join us


Thanks for stopping by.

Hugs
Carol x

LinkWithin

Related Posts Plugin for WordPress, Blogger...